Friday, August 21, 2015

Pasta Chips - Garlic Olive Oil Review

I got the change to try some of these Authentic Italian Pasta Chips because I received a full sized sample as a Kout Perk.  The flavor I tried was the Garlic Olive Oil flavor, which is the bag in the photo above.

These are baked PASTA chips.  Not POTATO.

They were very good.  I had eaten pretty much the whole bag full before I remembered that I should probably take a picture of it so I could do a review. 

There were only a handful of chips left, but very few of them were broken!  You know what its like to reach your hand into a nearly empty bag of chips.  Its just a bunch of greasy crumbs.

Well, these chips came from the bottom of the Pasta Chips bag, and just look at them.  Whole, and not greasy at all!  The chip with the little ding in the corner was the WORST one of the last of the bag.  (Not counting the ones I had eaten before taking this photo of course)


The Garlic and Olive oil was a light flavor.  You know garlic can be overwhelming, but this one was not.  It was perfect.  If you're not a fan of garlic, the Garlic and Olive Oil is only one of six different flavors, including Spicy Tomato Herb and the Spinach Broccoli Kale Veggie Pasta Chip!

And while I ate all of my chips dipless, the Pasta Chips website has loads of great recipes you can use to create great dips and MORE with these great chips!

And if the lack of grease and the great flavor isn't enough to sell you on these chips how about these little tidbits:
  1. Pasta Chips are Made in the USA.
  2. Pasta Chips are a NON-GMO Verified product. 
  3. Pasta Chips are Vegan!
  4. Pasta Chips have 20% less fat than the leading pita chip.
Then there is this cheeky promo video:


I hope I have convinced you that Authentic Italian Pasta Chips are worth a try!
Which one of their six flavors would you like to try?
If you HAVE tried them, how did you like them.

Remember to SHARE this with your chip loving friends so they can discover the great snack that is the Pasta Chip.

Monday, August 17, 2015

Flower Prints From a Gelli Plate


Today was a rainy day in my world.  Early in the morning a thunder storm rolled in.

I sat down in front of youtube feeling rather uninspired, and started watching craft videos.  Then, in the playlist, one by The Frugral Crafter popped up and she was making floral prints with her gelli plate.

I have an 8"x10" gelli plate and I love to use it, but rarely pull it out.  I don't know why.

A Gelli Plate is a permanent mono-printing tool.  It is a squishy plasticy material that you smear paint on, then press paint on, and it makes a LOVELY print.  The best part is that even if you do the exact same thing a second time, you're print is not going to be exactly the same.  That is the joy of mono-printing.  One of a kind prints with every pull.

In the video I watched today she made a painting of a daffodil using her gelli plate and made it look so easy that I wanted to try myself.

The flower I used first was an iris.

In the video the technique was to start with the background first, then add the image one layer of paint at a time, starting from the back and working forward.

Lindsay made it look super easy in her video.  Mine did not come out as "realistic" as her, but I do enjoy the results.

This was my iris.


And I liked the iris so much I decided to try my hand at the daffodil too.  In fact, I was inspired to do a triptych.  Three related prints.  I was going to do a daffodil then a rose.

Here is my daffodil.


 I didn't like the results of my daffodil as much as I did my iris.  I didn't do the rose because I had to stop and feed my son.  I might save my rose print for another rainy day.

If you want to try your hand at making flower prints from a Gelli Plate, then I suggest you watch the video below.  It is the one that inspired me.


What do you think of my flowers? Which one do you like best?
Feel free to let me know in the comments.
If you REALLY like them, PLEASE share them on Pinterest or any other social media so other people can like them too.

Wednesday, August 12, 2015

Hanging Post-it Note Memo Board


It is back to school time, and students are looking for cute, fun and functional locker and dorm room decor.

This DIY Memo Board fits the description.  Not only is it simple to make, it is as unique as the person using it, and can be made to hang over a doorknob, or to hang inside of a locker door.


SUPPLIES


lightweight wood plaque
post it notes
acrylic paint and brushes
ribbon (or magnets)
glue
stickers and ephemera for decorating

STEP 1


Paint your plaque

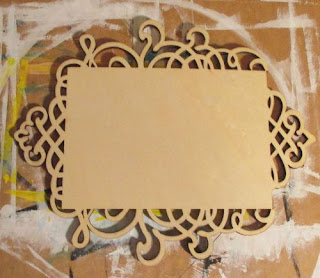
To make my memo board I used a lasercut plaque I got on clearance at Michael's.


But really, any lightweight wood plaque would work.  You can even get a pack of 6 wooden plaques and make one for all of your friends!

I painted the center of my plaque with Folk Art Sunny Yellow paint.  I painted the fancy edges with Dazzling Metallics Peacock Pearl.

I used washi tape to mask the edges I already painted while I put the paint on the center.


OPTIONAL: If you don't want to paint your plaque you can decorate it using colorful patterned scrapbook paper instead!

STEP 2


Decorate your plaque.

This is the fun part, and you're not limited on how you decorate it.  You can use stickers, ephemera, or even more paint like I did.


I used a stencil (I think it was a recollections one from Michael's) to paint blue polka dots on the yellow background.


The only thing to keep in mind while decorating is that you must leave room for your post its somewhere on the board.

STEP 3


Attach your ribbon.

If your plaque has a fancy edge like mine does, you can tie the ribbon on with a pretty bow.


If it is a plain plaque then you can use hot glue or tacky glue to tack the ends of the ribbons to the back. (I actually used this method on mine.)  If the plaque is thick enough you could also keep the ribbon in place with a thumbtack or staple.

OPTIONAL: If you don't want to hang your memo board with a ribbon you can use these ceramic magnets.  Just glue them to the back and you can stick your board to the fridge or inside of a school locker!

STEP 4


Put on your post-it notes and proudly display.


You'll notice my post-its are star shaped.  Post-it notes have come a LONG way from sticky yellow squares. Click here to check out a few of the shapes available!

HINT: Don't try to stick a whole pad of Post-its to the board at once.  Post-its are not THAT sticky.  Just stick up a few pages at time and refill as needed.

What do you think of my memo board?  Will you try making one of your own?  If you do I would LOVE to see the results!

Friday, August 7, 2015

Shift by Em Bailey

http://amzn.to/1Ng2DVt
“I believe in grey...Some things aren't straightforward. Not everything is true or false, real or imaginary, black or white. It's not that simple.” ― Em Bailey, Shift

Olive Corbett is just trying to disappear into the background.  She takes her meds, and avoids as much trouble as she can, even though she knows people are still talking about her "incident."

Then a new girl shows up, and the schools attention turns to her.

There are a lot of rumors about Miranda Vaile including that she was an orphan, who killed her parents.

Olive and her best friend Ami are the only ones who are not obsessed with Miranda.  Even Katie, the schools Queen Bee pushes girls our of her clique to make room for Miranda.

But only Olive seems to notice that the more Miranda prospers, the more Katie seems to fade away.

But who would believe Olive if she tried to convince someone that Miranda was stealing Katie's life?

Then, Miranda turns her sites on Olive herself.

Is she really just a lonely girl looking for a friend to gets her, or is there something Evil inside of Miranda Vaile?

"Shift" by Em Bailey is a young adult thriller, and the story keeps moving pretty fast once you get going.  There are supernatural undertones to the story, as Olive becomes convinced that Miranda is a shape shifter stealing the lives of other people.

Outside of that it has the usual drama of a teen novel.  A social outcast teen.  A "cool kid" love interest.  A no-nonsense best friend.  A "she used to be my best friend but now we're enemies" antagonist.

For much of the book I was pulled along by my interest in what Olive's "incident" actually was.  And trying to figure out why Olive's mom didn't approve of her best friend Ami, who seemed to be a good enough girl.  By the end I was trying to figure out what exactly was going on with Miranda.

I would give this novel 5 stars.  I enjoyed it and would recommend it to anyone who likes YA fiction.

Thursday, August 6, 2015

Easy Peach Cobbler Dump Cake


Easy Peach Cobbler


There are some people who can go into a kitchen with four ingredients and whip out a 12 course meal.  These people are the culinary equivalent of MacGyver.

I am here to tell you now that I am NOT that person.  When I go into a kitchen I'd much rather have a frozen dinner to stick in the microwave.  But sometimes I want something different, and that means cooking.

So, when I decided I wanted a peach cobbler I decided to try to find the easiest way to make it ever.  But it couldn't just be easy.  It had to be easy and taste good.

I found an easy peach cobbler, but its not exactly a peach cobbler. It is something even more amazing called a dump cake.  You take 4 ingredients and dump them together and something amazingly yummy comes out.

Below I'm going to walk you step by step through how to make this dreamy dessert.

Easy Peach Cobbler Dump Cake


INGREDIENTS

 1 box of yellow cake mix
2 cans of peaches
1 stick of butter
1/2 cup brown sugar
cinnamon (optional)

STEP 1

Preheat the oven to 350.


 While preheating open the cans of peaches and dump them, juice and all, into your 9x12 baking dish 
If you wish to cut the peaches into smaller size you can, but do not have to.

STEP 2

 
Open your yellow cake mix and dump it on top of your peaches.
DO NOT MIX.
It is important that the cake mix is on top, not mixed in with the peaches. 

PS: SAVE the box the cake mix came in!  We're gonna make something fun with that soon!

STEP 3


Cut your stick of butter into many, many pieces.
Scatter these pieces all over the top of your cake mix.
Get as much coverage as you can.

STEP 4


Sprinkle your brown sugar all over the top of everything.

I'll admit, I did not have half a cup of brown sugar in my house.  I used what I had, then added cinnamon.
Cinnamon is optional, but I WILL be using it ever time I make this.

STEP 5


Put your dish in the oven and bake for 40 to 45 minutes or until golden brown.

The butter melts down into the cake mix, while the peach juice bubbles up into the cake mix.  The crust turns out crispy and buttery and sweet.

STEP 6


Serve and enjoy!

It was pretty amazing.  I will say it was VERY buttery and VERY sweet.  I loved that, but if you are on a diet and/or diabetic this might not be the best version of peach cobbler for you.

If you would like to try other dump cakes I recommend you check out The Absolute Best Dump Cake Cookbook: More Than 60 Tasty Dump Cakes

*******

If you try this Easy Peach Cobbler Dump Cake Recipe I would love to hear what you thought about it.

Have you ever made a dump cake?  If you have any other easy dump cake recipes I would love for you to share them with me!